Thursday, February 24, 2011

Bliss is...

...debossing, embossing and creating my own decorative paper with stamps!  For such a simple card I sure have a LOT of techniques going on.  This new FREE stamp set, Bliss, is ideal for making elegant cards with a beautiful demask background!  (maybe that's not what you'd call it)  Anyway, I used whisper white ink on that larger detailed stamp in the background- it shows up awesome on Black paper.  You could even use any light colored craft ink as well!  The main image with the bird on top are stamped with black craft ink then heat embossed with clear powder, then I dabbed a bit of Blushing Bride ink on the bird's belly. 

My circle piece, which is Pink Pirouette, was embossed with the Vintage Wallpaper embossing folder and Big Shot, then flipped over and gently sponged with some ink.  I've also got a large silver brad, small rhinestone and some black satin ribbon on there to step up the bling!  Oh, almost forgot about the paper piecing around the circle- it looks neat if there is light showing through. 

Speaking of forgetting, I started out using the Mojo Monday sketch challenge for this but now am realizing I left off the verticle ribbon piece... may have to rework this so it fits and so I like it a bit better. If I redo it I'll be sure to add it to this post!  I also missed the deadline to enter this.  Oh well, still a fun sketch to use!

Thanks for stopping by!
~Kristin

SUO Supplies
Stamps: Bliss
Colors: Basic Black, Blushing Bride, Pink Pirouette
Accessories: white ink, 2 1/2" circle punch, Big Shot, Vintage Wallpaper embossing folder, distressing tool, rhinestone, clear EP, large silver brad, sponge, black satin ribbon, paper piercing tools
Wednesday, February 23, 2011

It's a Diva Color Challenge and a new technique!


Hi and welcome back!  I've got a Diva special coming right up!  Today we've got for you a color challenge that is delightfully feminine- Blushing Bride, Early Espresso and Rose Red.  Not a hard combination to use, especially in February when Valentine's Day is still fresh in our minds. 

As promised on Monday here is a second version of this embossing technique I learned from Stampin' 411 using punched pieces to make your own embossed pattern.  I am in love with this technique!  For this one I used hearts, obviously, and the best part is I used repositionable adhesive to glue them to a scrap piece of cardstock so I can move them around and reuse them as often as I'd like.  The other best part is you can use those thin white pieces of 12x12 chipboard that come with every pack of designer series paper (DSP)! 
The adorable stamp set I used here is called Create a Cupcake which perfectly coordinates with the matching punch to easily cut out the cupcake parts!  Like the inside?  Had to make it cute as well!  The sentiment on the inside is from a new hostess set called Something to Celebrate- a very useful set!

Want to see another card made with the Create a Cupcake stamp set and punch? 
There you go!  A CASE from our Stampin' Success magazine that SU Demos get each month.  Isn't that cute?  And so easy since the punch actually cuts out the cherries too!  No hand cutting. 

Would you like to host a workshop where I teach you and a group of your friends and family how to make cards like these?  I'd love to teach you, so just let me know and we'll work something out! 

Thanks for stopping by today!  Be sure you hop on over to the DCBD blog for more great samples of this color challenge!
~Kristin

SUO Supplies (card 1)
Stamps: Create a Cupcake, Something to Celebrate
Colors: Rose Red, Early Espresso, Blushing Bride
Accessories: Build-a-Cupcake punch, Heart to Heart punch, Decorative Label punch

(Card 2)
Stamps: Create a Cupcake, Woodgrain background
Colors: Crumb Cake, Soft Suede, Old Olive, Cherry Cobbler
Accessories: Build a Cupcake punch, Dotted scallop ribbon border punch, mini library clip

Tuesday, February 22, 2011

Build a Blossom

Have you seen this new set Build a Blossom in the Occasions Mini Catalog yet?  And its fun coordinating punch, Blossom Petals?  I've had fun playing with these that I borrowed from my friend and downline Jennifer.  Versatility is always important for me when I'm deciding which stamps and accessories to buy.    So I had to play around before deciding.  This first card is pretty straight forward, using the punch and stamps just as designed.  I've also borrowed the sketch from Create with Connie & Mary.   
SUO Supplies:
Stamps: Build a Blossom, Thoughts & Prayers
Colors: Soft Suede, Cajun Craze, Early Espresso, Sahara Sand
Accessories: Blossom Petals punch, Decorative Lable punch, Chantilly lace ribbon, Square Lattice Textured Impressions folder, Dotted Scallop ribbon border punch, Big Shot
Here is another use for this set. I saw the idea of using the petals as wings on Create and Enjoy with THIS card.  I just had to try it out and loved it!  I also employed the new Framed Tulips embossing folder for good measure.  Sentiment, from Something to Celebrate hostess set, is stamped in Night of Navy on vellum cardstock and enhanced with basic Pearls.  So what do you think?

SUO Supplies
Stamps: Build a Blossom, Something to Celebrate
Colors:  Sahara Sand, Certainly Celery, Bashful Blue, Marina Mist
Accessories: Big Shot, Framed Tulips embossing folder, Scribbles Swirls Sizzlit, vellum, basic pearls

That buttefly card has me wishing for warmer temps.  Here is a photo I took last summer to brighten your day (and mine too). 
Thanks for visiting!
~Kristin

Sunday, February 20, 2011

Stamped My Heart Out!

It's been way too long- too much time away from stamping... so when I sat down to create for an upcoming workshop (after borrowing TONS of mini catalog stuff from my downline Jen, thanks Jen!) I couldn't stop!  I stamped off and on for three days I think.  Of course there were several interruptions since my hubby is out of town but I got seven cards done!!  Here are the first two I'm showing you. 

This first one was done with the new Sale-a-Bration set called Punch Bunch as well as some of the Ice Cream Parlor DSP .  I also tried a new technique out that I learned on Stampin' 411 called Embossed Backgrounds.  Do you see the embossed arrows?  Those were punched with the My Way arrow punch then ran through the Big Shot as shown on the awesome tutorial.  I LOVE to dry emboss with the Big Shot and this opens up fabulous new possibilities limited only by your punch and die cut selections!  Stay tuned, I'll show you another card using this technique on Wednesday for Diva Day!  The sketch for this card is from Pals Paper Arts- PPA81.

Here is another card that is very closely inspired by one in the Stampin' Success magazine that SU Demos get each month.  It is full of fantastic articles and samples to keep us inspired!  See that tiny delicate scallop at the top and bottom??  I used the Dotted Scalloped Ribbon Border punch that I thought I could live without and now know I can't! 

I hope you like these.  I'll be sure to be back with more.  Tuesday I'll show you the projects my ladies did at the workshop I'm having tomorrow! 

Have a great day!
~Kristin

SUO Supplies
Card 1: 
Stamps- Punch Bunch
Colors- Basic Gray, Melon Mambo, Old Olive
Accessories- My Way punch, Big Shot, circle punches, owl punch, scallop square punch

Card 2:
Stamps- I {Heart} Hearts
Colors: River Rock, Not Quite Navy, Marina Mist
Accessories: Heart to Heart punch, Basic Pearls, Marina Mist narrow ribbon, large heart punch, Dotted Scalloped Ribbon Border punch

Tuesday, February 15, 2011

A Vintage Birthday

Gotta run, will add the details in a bit! 

OK, I'm back with details.  I cheated a bit and put this up early last night so I could still make it in for the PPA challenge to use a bit of vintage style.  But it is also for today's DCBD sketch challenge.  I've flipped the sketch on it's side which is normal for me. With all its details and layers, vintage style is not normally one I gravitate to so this took me a while... but I'm pleased with it.  I almost called it done before I decided I needed the flowers to stay true to the sketch.  Glad I added them- it was too plain without them.  The flowers were easy to make, just punched about 3 flowers for each one with the Boho Blossoms punch then crumpled them up and layered them and added the pearl.  

I used two different stamp sets to pull this one off:  Vintage Labels and Vintage Vogue.  I guess having "Vintage" in the title was the only way I was sure they could pass for vintage.  LOL!  

If you don't recognize the papers they are from a pack of Designer Series paper called Recollections from, oh I don't know, maybe three years ago.  Quite old for paper! 

Well, thanks for visiting and for your comments- they bring me cheer on these long and dreary winter days.  Thank goodness for sunshine and these 50+ degree temps they keep promising are coming! Make sure to go visit the DCBD blog and play along with this week's sketch challenge! 
~Kristin

SUO Supplies
Stamps: Vintage Labels, Vintage Vogue
Papers: Confetti Cream (card base), Recollections DSP, Chocolate Chip, Very Vanilla
Ink:  Chocolate Chip, Cranberry Crisp
Accessories: Chantilly ribbon, Basic Pearls, Boho Blossoms punch, Wide Oval punch, corner rounder

Thursday, February 10, 2011

A few more 12x12 layouts

 
These two pages are actually two different events, but they will face each other in the album so I made them coordinate.  The tree idea with the ornament punch is from the Stampin' Up! Catalog page 35 if you'd like to check it out!  Wondering how I embossed the entire length of the 12" piece of Early Espresso paper on the right layout?  It is actually two pieces of paper, embossed separately, and the seam is covered with the ribbon.  Clever huh?!
This is a layout I have dreaded- mostly because the pictures aren't great and the first time I used these pictures (in another album) I wasn't pleased with the result at all.  Well, this one is better.  Took me long enough, but I actually am somewhat pleased.  Remember the old Wintergreen DSP?  That's what I used on here.  Title was made with the Cricut.

And finally this layout.  I'm now noticing how muted all my colors are.  I must have been in a muted kind of mood that weekend.  This layout puts the Simply Scrappin' Kit Summer Home to use.  Everything is from the kit except the rub-on letters (which are by Making Memories and quite old!) and the brads which are all SU. 

Since I'm backtracking to 2003 to do these pages none of these are digital pictures.  I promise I'll get back to digital one of these days and hopefully be working with better quality pictures!

Hope you are well!  Thanks for visiting today.
~Kristin

Wednesday, February 9, 2011

Second Post for today- be sure to scroll down to see the Diva Challenge!

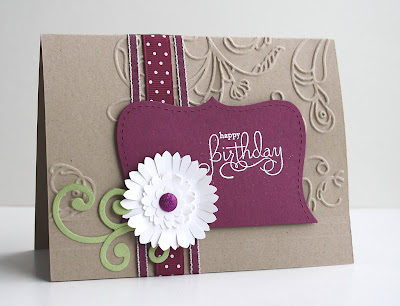
 To get back to my lost mojo I have been playing along with a variety of challenges.  The PPA color challenge; Riding Hood Red, Certainly Celery and Rich Razzleberry worked for this birthday card.  Oops, as I typed that I realized I left out the Riding Hood Red.  Good thing I missed the deadline for entry!  Guess my brain is still only partially functioning.  Anyway, I also really liked the looks of this sketch challenge over at Create with Connie & Mary's blog so I used that too! 

Up next is the first of four double page layouts I did recently.  My sister got a Cricut for Christmas so I got to play with that for my title.  Everything  else is from Stampin' Up!  The layout is one I found in an old Creating Keepsake magazine.
I hope you are having a great day!  Live like you mean it!
~Kristin

SUO Supplies for card:
Stamps: Well Scripted
Colors: Crumb Cake, Rich Razzleberry, Certainly Celery, Whisper White
Accessories: Top Note die, Big Shot, Scallop circle punch, Boho Blossoms punch, Glimmer Brad, Scribbles Sizzlit, Rich Razzleberry ribbon in dotted grosgrain & narrow, White embossing powder, Elegant Lines embossing folder

Sweet Celebration

First of all, thank you for your kind comments and emails regarding my last post.  It was a difficult week and your thoughts and kind words were appreciated.  Since then we've lost another close (92 year old) friend who's funeral will be tomorrow.  A sad time for sure. 

On a happy note though, I am taking some time to appreciate and count my blessings.  And, I managed to actually stamp yesterday which is very theraputic and helped immensely.  This card is for today's DCBD color challenge to use Basic Gray, Pink Pirouette and Real Red together.  Not hard considering Valentine's Day is coming right up.  However, I made mine a birthday card since I'm a bit behind sending some birthday wishes lately. 

I also put to use the Card Patterns sketch 101, but flipped on its side. 

I hope you like it and will consider playing along!

Stampin' Hugs,
~Kristin

SUO Supplies
Stamps: Sweet Scoops
Colors: Pink Pirouette, Basic Gray, Going Gray, Whisper White, Crumb Cake (for the cone), Real Red
Accessories: Silver brads, Sending Love Epoxy Brad, Real Red dotted grosgrain ribbon, crimper, Modern Label punch

Friday, February 4, 2011

Appreciate your loved ones

It's been over a week since I've posted here and I wanted to stop in to share a quick note about what's kept me away.  A dear dear friend of my family, my best friend's little sister, passed away unexpectedly this week.  It is a terrible tragedy and has left everyone who knew her reeling.  Please take a moment to appreciate your loved ones today.  Thank you for your patience and understanding.  I hope to have something to share with you next week. 
~Stampin' hugs, Kristin